 Life seems to get busier and more stressful by the day.
Sometimes, days go by and you realize you haven’t had a chance to sit down and chat and connect with your child in a meaningful way.
Mornings are a rush to get to school, carpooling involves a van full of friends teasing or bickering or lost on their devices, weekends are full of extracurriculars, evenings mean homework, and dinners, while often the best time for connecting, more frequently devolve into complaints about the food and cajoling one more bite.
How do we slow things down, even for an hour?
One answer is to intentionally incorporate creative activities for children into your schedule through simple art projects.
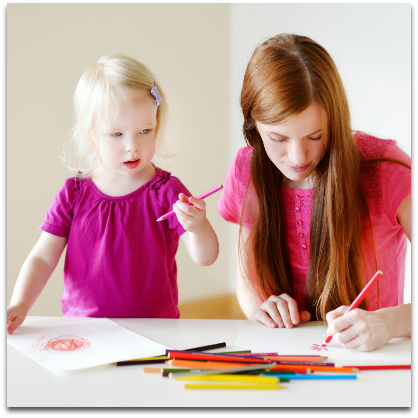 When my kids were younger and would come home from school cranky, anxious, or angry, the first thing they needed was a way to blow off steam.
Okay, actually, the first thing they needed was a snack. But the very next thing they needed was a way to relieve their anger and anxiety.
Questioning them outright about their day rarely elicited any answers, and sometimes only made them more upset. I found that the best way to calm them down and defuse the anxiety was to have an “art party.”
“Let’s make something!” I would pull out the art box and hand out some paper. And slowly, a miraculous change would occur: the anger and anxiety would dissipate, and as we puttered about with paints or crayons, the stresses of the day would emerge, the stories would be told, and conversations could unfold.
And now that my kids are older? Now I find that they engage in their own creative pursuits when life gets stressful. My daughter will make cards for upcoming birthdays or plan elaborate costumes to make, while my son will head out with a camera to photograph nature.
Whether it’s a drawing, a painting, or a craft, the act of creativity is a way to escape, for a little while, the stresses of the day. Artists talk about entering “the zone” or having “flow”– that Zen-like space where your brain stops whirling and worrying about all the minute details of your day and simply focuses on one thing. It’s like meditation, but with something tangible to show for it at the end!
Creativity also has an added benefit: it is crucial for your child’s development.
Child experts agree, fostering creativity is a vital aspect of learning and growth. A further upside is that art is beneficial to you too!
4 more great reasons to intentionally incorporate creative activities for children into your weekly schedule:
Develop fine motor skills: For little ones, coloring, cutting and pasting, drawing circles and squares and even squiggly lines: the act of making incorporates fun into learning important skills.
Boost confidence: “I made that!” Making something with your own two hands is a great way to boost confidence in your abilities. Not just your artistic abilities, but creative confidence bleeds over into other areas of life and gives kids (of all ages!) that added inner boost that they can do it, if they only try.
Creative thinking: Thinking creatively in one area leads to creative thinking in other areas of your life, which leads to better critical thinking and increased problem solving capabilities as kids grow older.
Talking time: Sitting face to face for a designated “talk” is a sure-fire way to get kids to clam up. However, sitting and painting or making something eliminates that laser focus on them, and allows kids to feel more amenable to conversing about their day or about things that might be bothering them.
But Where to Start?
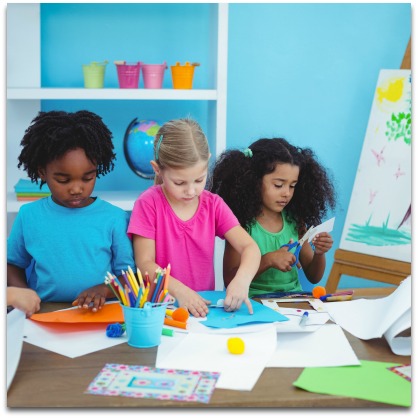 Like many of us when faced with a blank piece of paper or canvas, the doubt sinks in: that fear of making the first mark. What if I mess it up?
Fear not! The following projects will not only help jump start your creative time and get you inspired, but they will eliminate that blank-page terror at the same time.
Before you start, you’ll need some materials. Don’t worry, you don’t need to break the bank on art supplies, but you do need a few basic items: washable paints, paper, crayons, washable markers, glue and scissors are a great starting point. Some projects require some special materials, but the Dollar Store is your friend. Most Dollar Stores have everything you need for a great arts and crafts experience.
The easiest way to incorporate arts and craft into your weekly (or even daily!) routine is to keep your materials handy. Designate a special art drawer, or find a cardboard box to store your art supplies so that they are all together and easy to access. One of your art activities could be decorating the art box!
Now: Start creating!
Below are five great art activities that are low in cost, high in fun, and suitable for most ages.
1. Finger Painting
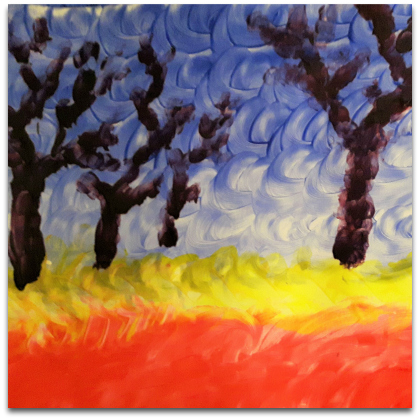 Make an abstract work of art.
Benefits: finger painting is a great project to start with because it needs minimal supplies, anyone can do it, and it takes no artistic expertise. The tactile experience of smooshing paint with your fingers is highly therapeutic. It helps little ones develop fine motor skills and older kids push the boundaries of what they can do with just their fingers and some paint.
(Note: If your child hates to get his hands messy, you can give him rubber gloves.)
What you need: tempera paint or finger paint (look for non-toxic). Paper – you can find special non-absorbent paper or pads of “finger painting paper” but any sort of thick paper such as cardboard or pasteboard/Bristol board will work. Just remember that the thinner the paper the more it will buckle and possibly rip. Drop sheets or plastic bags to cover the work surface. Bowl of water. Tape.
What to do:
- Cover your work space: tape down a garbage bag or newspaper, or use a plastic tablecloth.
- Tape your paper to the work surface.
- Set out your paints, either in the bottles they came in, or squeeze some paint into plastic containers for easier access.
- Have a bowl of water close by to rinse hands before switching to a new colour.
- Dip your fingers and start painting!
2. Watercolour Creatures
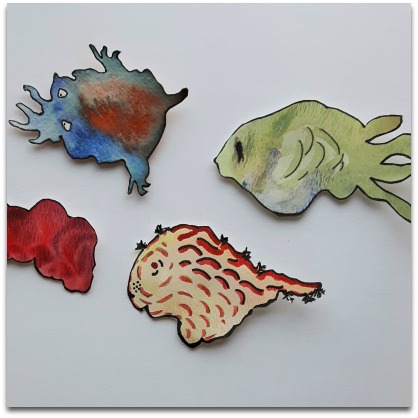 Create strange and wonderful creatures and monsters. This idea comes from the book Imaginary Animals by Carla Sonheim. I love this book and often come back to this activity to jumpstart my own creativity whenever I need a push.
Benefits: this activity sparks the imagination and encourages kids to make up stories for their creatures.
What you need: watercolours and brushes (a basic kids’ palette of inexpensive colors is really all you need). Watercolour paper or mixed media paper. Black pen or marker.
What to do:
- Paint some water in an abstract shape on your paper, such as circles or swirls.
- Wet your brush and load it up with paint.
- Dip the tip of the brush into the water on your paper and watch as it spreads and drips.
- Add another colour or leave as is. Let that one dry and do another. The great advantage to watercolour is that is dries quickly!
- Once you have a few blobs and shapes, let them all dry. (Take a short break for some apple slices or a glass of water.)
- When your watercolour blobs are dry, take your black marker and trace around the edges. Give your creature some eyes, maybe several legs. Wings? Why not?
- Then, cut around your creatures.
- Now you have a bunch of creatures in search of a story. Paint a picture of house where they live, or a city, or a forest they can explore.
3. Dream Home/Doll House Collage
 Make a house (or castle, or cruise ship, or space station) with many rooms and decorate the rooms.
Benefits: Excellent way to use up the flyers and magazines that come to the door. This activity is also great for encouraging imagination and storytelling. Plus, this is an excellent project for silliness and fun!
What you need: large sheet of paper. Pencils or crayons. Magazines, flyers, or old books with lots of photos (I have found a lot of these at thrift shops). Scissors and glue.
What to do:
- On the large sheet of paper, draw the outline of your house (or space station, or castle, or tree house) and divide it into rooms.
- Label the rooms if you want (kitchen, bedroom, swimming pool room, skateboard park room)
- Cut out pictures and glue them into the rooms. Would you love to have a tree house in your bedroom? Cut out a picture of a tree or tree branch and paste the bed up there. A bowling alley in the basement? A climbing wall in the castle tower? What about a swimming pool in the living room? It’s your house, design and decorate it to your precise specifications!
4. Fishy Fridge Magnets
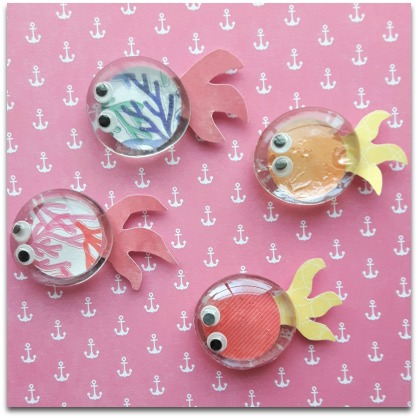 Put together a school of fish for your fridge.
Benefits: This activity helps with fine motor skills in little ones and is a lovely exercise in creativity for older ones. The finished product also makes a great gift, plus they are fun to play with on the fridge.
What you need: Bag of glass, flat bottom rocks from Dollar Store. Coloured papers (or use a sheet of your colourful finger painted paper. Scissors, glue, and small magnets (again, you can find these in the dollar store). Googly eyes and pompoms, etc.
What to do:
- The glass ‘rocks’ (they might also be called gems) I found were about 1 inch in diameter, and I have a one inch hole punch. If you don’t have a hole punch or your rocks are a different size, trace around the rock on your paper and cut out the circle.
- Put some glue the right (good) side of the paper and glue it to the bottom of the rock. Most glue dries clear, but you might want to double-check your glue before you start.
- Draw a wiggly fish tail or some fins. Cut them out and glue to the back of the paper.
- Add some googly eyes, or pompom decoration.
- Finally, glue the magnet to the back of the rock. When it is dry, stick it on your fridge.
- These make great gifts for grandparents who keep photos and art work on their fridge. Your child could also paint an underwater scene and attach it to the fridge with their fishy magnets.
5. Personalized Christmas Elves/Paper Dolls
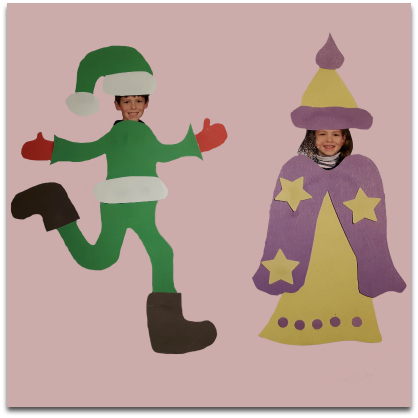 Using your child’s picture, make a body and create a personalized paper figure.
Benefits: this activity is super fun because it includes a picture of your child. The finished product makes a great gift for grandparents and other family members, or you can use them as paper dolls to play with, or attach a string and hang them form the Christmas tree. (Fun note: my sisters and I did this when we were kids, and then our children made them when they were younger. Now, every year, the highlight of decorating the Christmas tree is hanging our elves on the tree and getting a kick out of how we looked back then.)
What you need: Picture of your child’s face. This is a great use for the extra “wallet-size” photos you get with your child’s school pictures. You can also simply paste a picture from your photo files into a word doc and print out – the quality doesn’t need to be perfect. Paper and crayons, scissors, glue and string if making them into ornaments. You can also use this craft to make personalized paper dolls and create fabulous outfits for them to wear.
What to do:
- Using the head picture as a guideline for scale, draw an elf body, or other type of body: a ballgown, a wizard cloak, an ogre, etc.
- Either colour the outfit, or cut out paper decorations and glue them on.
- Cut out the face: when cutting out the picture of your child’s face, make sure there is some extra photo at the neck area to glue it to the body.
- Glue the face to the body. Add a hat if you want.
- If making an ornament, glue a loop of string or thread to the back of the head to hang from the tree.
Need Some More Ideas?
Here is one of my favorite sites for art ideas for kids, and of course, Pinterest is overflowing with great ideas for creative activities for children.
While there are concrete benefits to encouraging creativity in your child’s life, the best part about carving out some arts and crafts time is the connection time you get when you sit with your children for the 30 minutes or so that it takes to make something creative. In the process of creating, there are quiet pockets of time where chatting and storytelling become possible.
So, start creating! Art is good for both you and your kids. The benefits are long-lasting and the together time is priceless. Pull out your art supplies, de-stress, and make something fun!
2-Minute Action Plan for Fine Parents
For our quick action plan today:
- Take a look at your schedule this week and find an hour (or even half an hour) to devote to arts and crafts. Write it in your calendar and commit to it.
- Pick one of the crafts described above, or choose your own.
- Plan out when you will talk about craft time with your kids and get them excited about it.
And then go for it!
Ongoing Action Plan for Fine Parents
Over the course of the next few weeks,
- Make craft time a recurring fun time.
- Encourage your kids to add to the list of things to make for future craft times.
- Keep an eye out for inexpensive arts and craft supplies to add to the art box whenever you are out and about.
- Save recyclable materials that can be used for arts and crafts: flyers, magazines, egg cartons, toilet paper rolls.
- Encourage all personalized adaptations to the art or craft: it’s not about the perfect finished product, it’s about the creative process.
- Make a point to incorporate creative activities for children in your weekly schedule as a way for both you and your kids to decompress, de-stress, enjoy each other’s company, and have fun!
Love these ideas. They remind me of the activities my oldest used to do in talk therapy as a child — it’s so true that kids are more willing to engage if they’re doing something else! Thanks for the tips.
You’re welcome! And I agree: sometimes a less direct route to conversation works best.
Thanks for sharing some fun creative activities for children and teens. I agree with you, it is easier for children to talk about their day if their are occupied with an activity. It gives them time to wind down and let their feelings out.
So true!
Thanks Karla!